Traditional
wallpapers installation
DISCLAIMER
Surfaces to be covered with traditional wallpaper must be clean and smooth.
Loose paint or other wallcoverings must be removed.
Nailheads, nicks, gouges, and other surface imperfections should be filled, sanded smooth, and sealed.
On new walls, drywall joints should be taped, bedded, and sanded smooth.
This wallpaper can be installed over almost any surface that has been properly prepared.
Do not install this wallpaper over ballpoint pen markings, wax crayons, ink markers, oil-based stains, or any foreign matter that may bleed through the vinyl.
If your wall isn’t smooth, you’ll need to either size the wall or apply a wallpaper liner which might require a primer layer as well.
ESSENTIAL STEPS BEFORE INSTALLING OUR TRADITIONAL WALLPAPER
Check your order
-
Unpack and check your order upon receiving it, even if you won’t install it right away.
-
If you think there is an error, defect, or flaw. Please, contact us before beginning the installation.
-
Check the labels on the bottom of each strip for a correct sequential installation. Some orders, like custom orders, murals, and larger patterns, will include the sequence to be installed at the bottom of each strip.
-
Start from left to right (Unless we suggest otherwise).
Prepare your wall
-
The wall/surface must be primed, clean, dry, and in good condition.
-
Remove any socket or switch covers and switch off the main power.
-
Sand down bumps, remove nails and screws, and fill in any cracks.
Gather your supplies
-
Wallpaper
-
Clean cloth
-
Wallpaper paste
-
Level and straightedge
-
Measuring tape
-
Craft knife with extra blades
-
Pencil
-
Paint roller & tray
-
Drop cloth
-
Smoothing tool (squeegee)
-
Sponge & bucket
-
Helper (is always handy)
Mark your starting and guiding line
-
Measure the width of one of the strips (or strip #1 if they are sequential).
-
Mark the same strip’s width on the wall and draw a mark with your pencil
-
Using your level, draw a straight line from the ceiling to the floor. This line is the guideline for your first panel. Never align a wallpaper to a corner or ceiling since they might be uneven.
TRADITIONAL WALLPAPER PASTE RECOMMENDATIONS
PRIMERS
Gardner-Gibson: Dynamite 221, 222 or 7222 Roman: Pro 909, Pro 935 R-35, Pro 988, Pro 990, or Pro Ultra Prime 977 Benjamin-Moore: Universal Wall Grip 203 Sherwin-Williams: PrepRite ProBlock, PrepRite Bonding, or Pre-Wallcovering Primer Zinsser: Gardz
ADHESIVES
Gardner-Gibson: Dynamite 234, 433, or 780 Roman: Pro 774, Pro 838, Pro 870 or Pro 888
TRADITIONAL WALLPAPER INSTALLATION STEPS
Paste the wallpaper
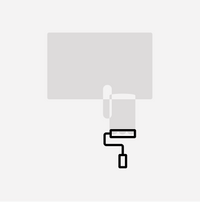
Apply the paste to your strip in the back of each strip by rolling it onto the middle of the sheet and then working it to the edges. All of the paper should be pasted evenly along the entire length and width of the strip.
Book your wallpaper
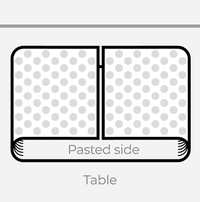
Book the strip by folding the top and bottom edges into the middle (pasted side to pasted side), making sure the side edges line up properly.
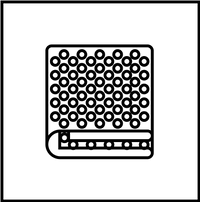
Roll up the folded wallpaper and don’t curl out and dry prematurely. It should remain like this for 5 to 7 minutes to allow the paste to absorb and the paper to expand and relax back to its new normal. This method will keep the adhesive wet and help handle the panels to ensure an easy installation.
Position the first strip
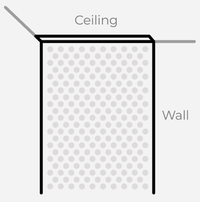
Apply the wallpaper to the top of the wall, allowing a bit of excess to overlap the ceiling (this will be trimmed off later). Align the right side of the strip to the guiding line you previously drew.
Apply and smooth the wallpaper
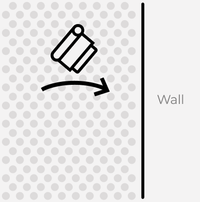
Use a wallpaper brush or smoothing tool to gently work the paper onto the wall, working from the tip and middle, down, and out. Smooth the surface, working to take out air bubbles as you go.
Apply more panels
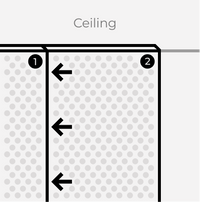
Select your next strip and apply it so its left side is butted to the right edge of the previous panel matching the repeat.
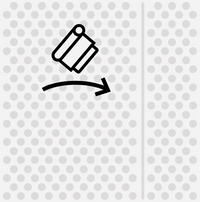
Smooth the second panel into the wall as you did with the first panel. Repeat the process all the way down and then smooth out any air bubbles.
Try to avoid getting paste on the surface of the wallpaper. Immediately remove excess adhesive from the wallpaper surface seam using a natural sponge, and a soft bristle brush; frequently rinse it in warm water and dry it with a cotton towel.
Trim extra material
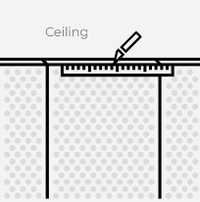
Trim excess material at the ceiling and baseboard with a straightedge and a sharp craft knife.
Change the blade often to ensure a smooth cut.
Overlap
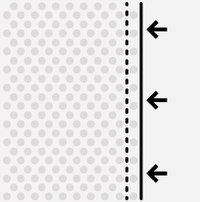
We added an extra 0.5” to your wallpaper panels for you to install one over the other. You must place the next panel 0.5” over the previous one. For textured walls, overlap helps maintain the dimensional stability of the whole installation.
If you requested your order with an overlap, please follow this steps for a correct installation:

